Blue Hawaii

This project has inspired me to listen to Elvis music. Truth be told Blue Hawaii is my least favorite Elvis song/movie. My favorite is Elvis’ Trouble from the King Creole movie. Even so, this original piece is very much Blue Hawaii, and it was originally made in Hawaii!

The Stats:

  • Dress: 100% Nylon, $6
    • Total: $6

I already tried to make it into a shirt once, which did not work, and I think I wore it 3 times. I was digging around my closet and found some items that need a readjustment, this is the first.

I took both pieces of the original dress apart and ironed them. I cut out the pieces of a pattern that I made originally. I did revise the pattern by adding a few inches to the bottom of the peplum.

2

I hated working with this fabric, it was fraying the whole time. It was so frustrating that I nearly threw out the project half way through. I decided that in order to stop the fraying I put in French seams. (That was a challenge.)

I then put darts in the front and then finished the bottom hem. Finally ready to wear!

7

Velvet Bear

Every year I try to give my sister a birthday gift that she will not get from anyone else. This does not always work, and let me tell you they are NEVER on time. This year is no exception. I am nearly a whole month late on getting this to her…but I will finally see her next week! I was unsure of what I wanted to give her until I bought a pattern for the RARE BEAR Army.  I have started to put aside fabric from the Collection that I think will make good bears. While I was sorting fabric I came across a few dresses that I forgot that I had. (blush) The first dress I am using has inspired me in a few ways but here is the first.

The Stats:

  • Green dress: Bodice 100% Velvet/ Skirt 100% Polyester, $7.50
    • Total: $7.50

I started by taking the skirt off, I knew that I didn’t want to use that for this project so I set it back in the Collection. I deconstructed the entire bodice, both the shell and the lining. I did this so I could make a pattern of it.

4

Once disassembled, I cut out all the pattern pieces that I needed and started sewing (yes I followed the directions). Shortly thereafter I was ready to stuff the bear. I decided that I wanted the bear to be relaxing so I added lavender to the bear. I threw it in as I was stuffing. Every 4th stuffing blob got approximately 1 teaspoon of lavender. (It now has a powerful smell and will be traveling with me inside a plastic bag.)

I sewed up the stuffing holes (per the directions), added the eyes and nose. I thought it needed something more so I gave it a necklace of lace.

So, Happy (VERY) Belated Birthday to my sister!


Fun Spring Dress

April is a little more than half over and I have finally started to get back into the swing of sewing. I started this dress because I needed something to wear when I went home for Easter.  This project was one where I truly have no idea why I purchased the original items and made the part of the Collection, but here they are.

The States:

  • Red Dress: 100% Rayon, $5
  • Black Dress: 50% Rayon/ 50% Acetate, $4
    • Total $9

I disassembled both dresses and ironed all the pieces. Then started on the bodice. The top of the red dress was too big but I didn’t want to put a lot of darts in it so I folded the back and took in the sides slightly.

9

Part of the black dress; the blue section and some of the black were cut it into 2 inch strips. I wanted to use the white as well but it had some weird stains on it, which would not come out. The white part was processed and will become part of my fabric yarn. I wanted to make the waist of this dress pronounced so I just strips of the black dress and added them together to create the waist.

After adding the waist band to the top of the bodice I went and inserted the sleeves. These were the original from the black dress. Thankfully I had my head on enough to make a pattern of them.

7

Next, I moved on to the skirt. First I cut off the facing where the buttons were and cut a swath of black to add into the skirt front.

I attached the skirt to the bodice, and the dress was done. I could wear it for Easter Sunday.

1

Another fun dress for summer! PS. A big THANKS goes to my father for taking pictures on this one!!

10.jpg

I have a few larger pieces of black going back to the Collection but all the red is gone! I am slowly paring down… what will I work on next?!

Paisley Dress

Sometimes I just get ideas and I don’t know where they come from, this dress is one of those ideas. It came to me while I was in a meeting, so I sketched it.

I then had to go to the Collection to find the right items to make this dress from.

The Stats:

  • Top Shinny: 100% Polyester (it is scratchy), $3
  • Paisley Dress: 100% Rayon, $4
    • Total: $7

I started with the top, which was once a night dress or house dress. I started by sewing two darts all the way from the shoulder to the bottom on the front face of the bodice.

I then disassembled the paisley dress. I needed to make the skirt 8 inches longer and a waist band. I used the bodice of the dress to make the additional 8 inches and the waist band. I used the the original skirt as is, and it has pockets! I am so happy as I didn’t need to do it myself.

I went back to the bodice and cut it off at the natrual waist and made sure to sew closed the zipper before anything else so it would not come undone and I would not have to replace it.

1

I then put fusible interfacing on the waist band and sewed it on.

2

The I attached the skirt and finished the arms with paisley binding fabric. Can now wait for spring to wear this dress out!

10

Now I can start working on my summer wardrobe see what comes out of the Collection next.

11


Society Sunday: Spring Has Sprung!

Morning has broken, like the first morning
Blackbird has spoken, like the first bird
Praise for the singing, praise for the morning
Praise for the springing fresh from the world.

-Cat Stevens

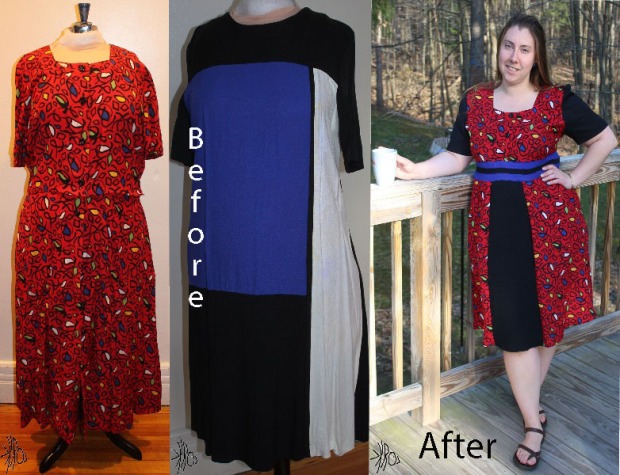
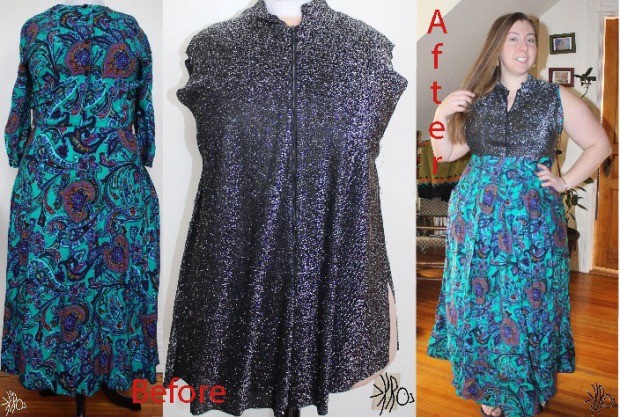
This song always come to my heart every spring and this year is no different. Not only is it very sunny, but the new year is flying into place. I have been working the whittle down the Collection and I have been doing that with the fabric yarn very well. I however ran into some problems with having pieces that were too small for fabric yarn so I decided to use them a different way: Crazy Quilt Squares!

This project was a few Society Sunday’s, during which I was the only one in attendance…again: Solo Sunday.

With the cleaning and moving of my studio I started with the quilt squares from all the scraps I found that were small. (To be honest, I am getting some from my mother as well, so I have A LOT.)

Thankfully my friend Robert always gives me his old sheets that were no long good for a bed but extremely useful for backing of quilt squares. I cut the sheets into 6 X 6 inch squares, I cut out about 50 of them.

These progression pictures are of only a few blocks that I made. The process for each is the same however.

  • Place center pentagon (do not sew).5
  • Sew the first side and center pentagon right sides together on to the base material.
  • Continue this pattern either clock wise or counter clock wise
  • Continued pattern and placement…
  • I added some striped already sewn together materials
  • Keep working the pattern until the stabilizing square is totally covered.
  • Cutting the final sides to the 6″ square pattern

I made over 60 of these squares and still have more fabric to go, but here are more some examples.

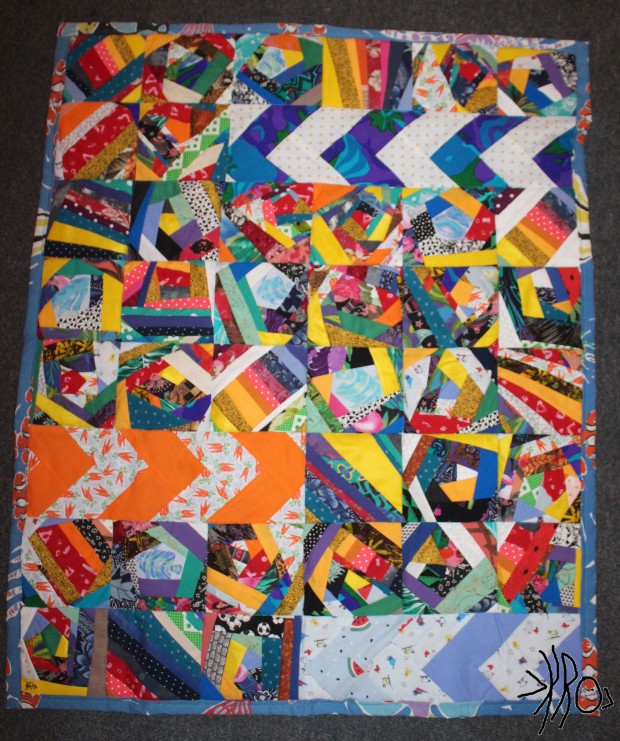
I also wanted to get rid of some of the bigger pieces that were too small for one project but could be used as parts of quilts. I wanted to try a herringbone pattern so I did:

1

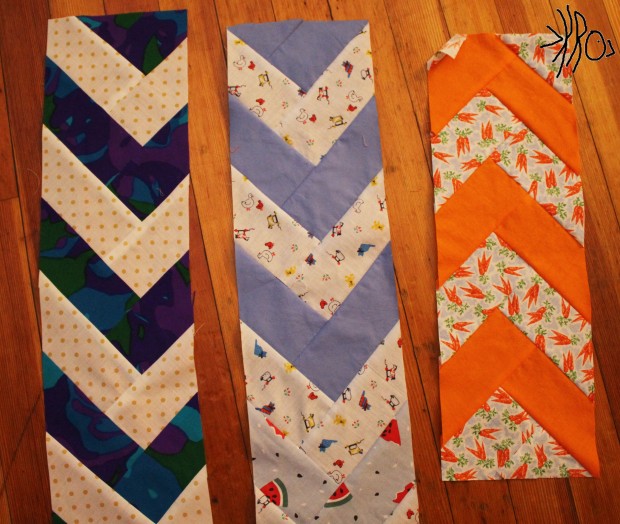
I took some of those same long strips and sewed them together in a different pattern.

2

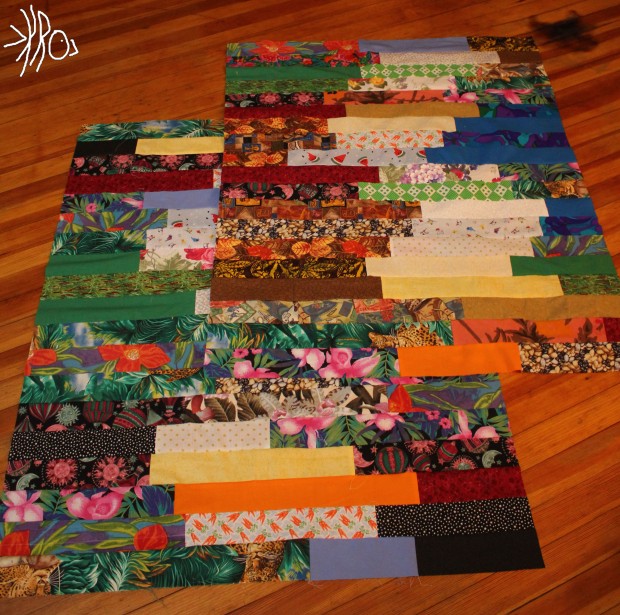
I now had to decide what size baby quilt I was going to make. The traditional dimensions of a baby blanket are 30 X 40 inches, and 36 X 52 inches for a crib blanket. I opted for the  30 X 40 inch. I set off on the usual batting, quilting, and backing part of the project. I finished the edge by using the back material as the binding. I like the way it turned out.

13

I had one family in mind for this blanket and thankfully I was finished before the baby was born! I was a little worried that I would not be able to finish it in time.

This is the first project where nothing is going back to the Collection. Check back to see what the scraps from the Collection finally turn into and what is given away.

Teal Flower Shirt

When I bought this I was thinking a bubble skirt with a short jacket. Like the drawing below.

However,  I know I would not wear that and so I have never made it. So, this outfit just sat around in the Collection for 3 years.

Last night after running out of scraps to twist into yarn I picked this project up and started to rip out the seams. I recently have moved my sewing studio to another section of my apartment and I realized that is was time to get it set up, so I completed that.

Now that everything is where it should go I can start sewing again. I needed another shirt like the one I mabe before so I started to sew.

French seams and all. However the sleeves were a bit harder than I thought but I finally figured out what I was doing once I read a few of my patterns.

The newest shirt which I can wear out today!

1

What else will come out of the new studio now that it is set up?

6

Goal Check-In: March

This month was off to a quick start but then slowed when I got a roommate and moved my studio. But I will have it back up and running shortly.

Goal 1: Harvard Top 100 Book List:

I have completed reading:  Finished Leaves of Grass by Walt Whitman, personally this book was good but I would not recommend reading it from cover to cover. I am still reading The Amazing Adventures of Kavalier & Clay by Michael Chabon, and I have started Middlemarch by George Elliot.

Goal 2:I have not purchased any new projects, but I was given a few new projects. One of the fabrics I was given will become a pair of summer shorts! (I need a few, so this will be me learning to make the perfect pair.)

Goal 3: 49% or 81 projects:  Now that I have finally moved and set up the studio I can get back to sewing. I will not lie there were a few things that I just cut up and started to use for the scrap projects that were “completed” on the list, but no tangible product was made with them yet! I also found a few new projects I didn’t know about when I did the initial inventory, so the list has now increased and the number of projects is actually 82, so not a huge increase.

  • Used: 17.96% and 30
  • Made: 14.97% and 25

Goal 4: Next year this goal is changing, 1 hour a day is nearly impossible now that I have started a sprint triathlon training program and volunteering regularly.

  • Proposed Hours: 31
  • Actual Hours: 29
  • Daily Average: .93

This month I didn’t reach my goal but I was close. I will have to keep up with this one a bit more for April. I think I can do this because summer is coming and I want more summer clothing!

Wish me luck for the next month… I think I’m going to need it.